
How to Get Better Real Estate Listing Photos With Your iPhone
You do not need an expensive camera or a perfectly prepared property to create strong listing photos. Learn how to capture useful images with your iPhone and use VisuGenie to correct lighting, perspective, glare, clutter, untidy rooms, and other common problems.
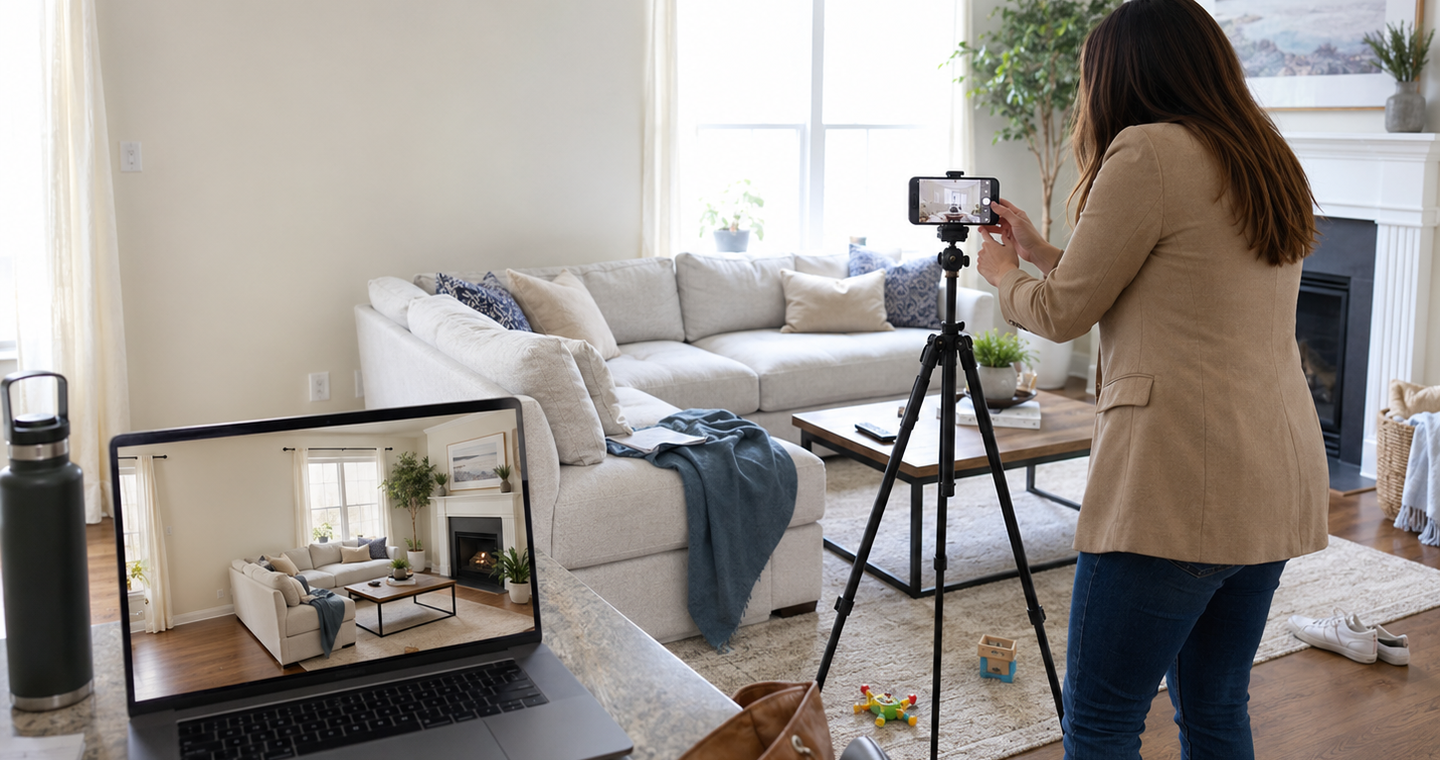
You do not need an expensive camera, perfect weather, an empty home, or professional editing skills to create good listing photos.
A recent iPhone can capture more than enough detail for many everyday property listings. The biggest difference usually comes from a few simple shooting habits—and from knowing that a photo does not have to be perfect straight out of the camera.
A room that looks slightly dark can be brightened. Tilted walls can be straightened. Harsh window glare can be reduced. Colors can be corrected. Personal belongings and distracting clutter can often be removed. Empty rooms can even be virtually furnished.
Modern real estate photo apps and AI editing tools such as VisuGenie can handle many of these common corrections in a few steps. Your main job while photographing the property is not to create a flawless final image. It is to capture a clear, useful starting point.
Listing photos are worth getting right. According to the National Association of REALTORS®, 81% of buyers rated photos as the most useful feature when searching for homes online. (NAR, “How to Maximize Online Visibility for Every Listing”)
This guide explains how to take better real estate photos with an iPhone, which settings matter, what can be fixed afterward, and when a professional photographer may still be the better option.
For more practical guidance, explore the Real Estate Photography topic guide.
Your iPhone is probably good enough to get started
Real estate photography can look technical from the outside. Professional photographers may use wide-angle lenses, tripods, exposure bracketing, flashes, and advanced editing software.
That does not mean every agent needs the same equipment.
Modern iPhones already perform a great deal of image processing automatically. Depending on the model, Apple’s Camera app can combine multiple exposures using HDR, stabilize darker photographs, lock focus and exposure, display a grid and level, and capture high-resolution images. (Apple, “Use iPhone camera tools to set up your shot”; Apple, “Adjust HDR camera settings on iPhone”)
The phone is therefore rarely the only reason a listing photo looks disappointing.
The more common problems are slightly dark rooms, overexposed windows, tilted walls, glare, inaccurate colors, personal belongings, untidy bedding, or an empty room that is difficult for buyers to understand. The reassuring part is that most of these problems can be solved easily with an AI real estate photo editor such as VisuGenie. It can help correct lighting and perspective, reduce harsh glare, enhance the final image, remove distracting personal items, clean up a room, or virtually furnish an empty space.
A slightly imperfect but well-composed photograph is much easier to improve than a technically clean photograph that fails to show the room.
| Problem | Can it usually be improved afterward? |
|---|---|
| The room is slightly too dark | Yes—lighting and exposure can be corrected. |
| Windows are too bright | Often—start with a darker source image that preserves window detail. |
| Walls appear tilted | Yes—perspective can be corrected. |
| Colors look too yellow or blue | Yes—lighting and color balance can be improved. |
| Personal belongings distract from the room | Yes—AI decluttering can remove selected movable items. |
| A large bin is visible in the room | Yes—it can usually be removed with AI. |
| Bedding looks untidy | Yes—AI cleanup can often make it look neater. |
| The image is slightly soft or low-resolution | Often—enhancement and upscaling may help. |
| The property was photographed in poor weather | Often—exterior lighting or weather can be improved. |
| An empty room feels difficult to understand | Yes—virtual staging can show a possible furniture layout. |
| The wrong angle was photographed | Not completely—a better source image is usually needed. |
| An important room was missed | No—the property needs to be photographed again. |
Use these simple iPhone camera settings
You do not need to change dozens of controls before every photograph. A repeatable setup is more useful.
Start by cleaning the camera lenses with a microfiber cloth. Apple recommends this when photos appear blurry, and it is particularly important when photographing bright windows and interior lights. (Apple, “If the camera or flash on your iPhone isn’t working”)
Apple also explains how to enable the grid and level, adjust exposure, use the timer, and select different aspect ratios in the Camera app. The exact controls depend on the iPhone model and iOS version. (Apple, “Use iPhone camera tools to set up your shot”)
Do not worry when your iPhone does not display every option listed below. The important principles are simple: use landscape orientation, keep the phone level, avoid digital zoom, and capture a bright, stable image.
| Setting | Recommended starting point |
|---|---|
| Camera mode | Photo |
| Phone orientation | Landscape |
| Aspect ratio | 4:3 |
| Grid | On |
| Level | On |
| Flash | Off |
| Main lens | 1x for most rooms |
| Ultra-wide lens | 0.5x when the room genuinely requires it |
| Timer | Three seconds when using a tripod |
| HDR | Automatic |
| Photographic Style | Standard or neutral |
| Resolution | Standard high-quality setting |
Start with the 1x camera
The 0.5x ultra-wide camera makes it easier to fit a small room into one photograph. It can be helpful in bathrooms, narrow bedrooms, utility rooms, and compact kitchens.
However, it can also stretch furniture and doorways near the edges of the frame. Rooms may look dramatically larger than they feel in person.
Begin with the 1x camera and move backward where possible. Switch to 0.5x only when you cannot show the important features of the room without it.
Minor distortion and tilted lines can be corrected afterward with editing software. Adobe Lightroom, for example, provides Geometry and Guided Upright tools for correcting architectural perspective. (Adobe, “Fix geometric perspective”)
The goal is not to avoid the ultra-wide camera entirely. It is to use it deliberately.
A tripod is helpful, but not essential
A compact phone tripod makes it easier to keep photographs at a consistent height, hold the phone level, photograph dark rooms without movement, and capture several exposures from exactly the same position.
Apple also recommends using a tripod to capture more detail with Night mode. (Apple, “Take Night mode photos with your iPhone camera”)
For an ordinary daytime listing, however, you can still produce useful results handheld. Stand firmly, hold the phone with both hands, and pause briefly before pressing the shutter.
Do not worry if the property is still being lived in
In an ideal situation, every room would be perfectly cleaned, decluttered, and prepared before the photoshoot. Real properties do not always work that way.
Many sellers and tenants still live in the property while it is being marketed. Their clothes, toiletries, family photographs, children’s toys, pet accessories, kitchen appliances, and everyday belongings may still be present. Moving everything out for a short photoshoot can be difficult, stressful, or simply impossible.
Do not let this stop you from photographing the property.
Remove the largest and easiest distractions where practical, particularly anything blocking a doorway, window, important feature, or walking area. You do not need to make the room completely empty or force the client to hide every sign of everyday life.
VisuGenie’s decluttering and custom-editing tools can help remove selected movable objects and personal belongings from the photograph afterward. This can include bins, cleaning supplies, toiletries, clothes, laundry, children’s toys, pet accessories, boxes, bags, personal decorations, photographs, excess objects on surfaces, and untidy or distracting bedding.
The aim is not to create a different property. It is to reduce visual distractions so buyers can concentrate on the room, layout, light, and permanent features.
Keep permanent property features and relevant defects visible. AI cleanup should remove movable clutter—not hide damage or alter what buyers are purchasing.
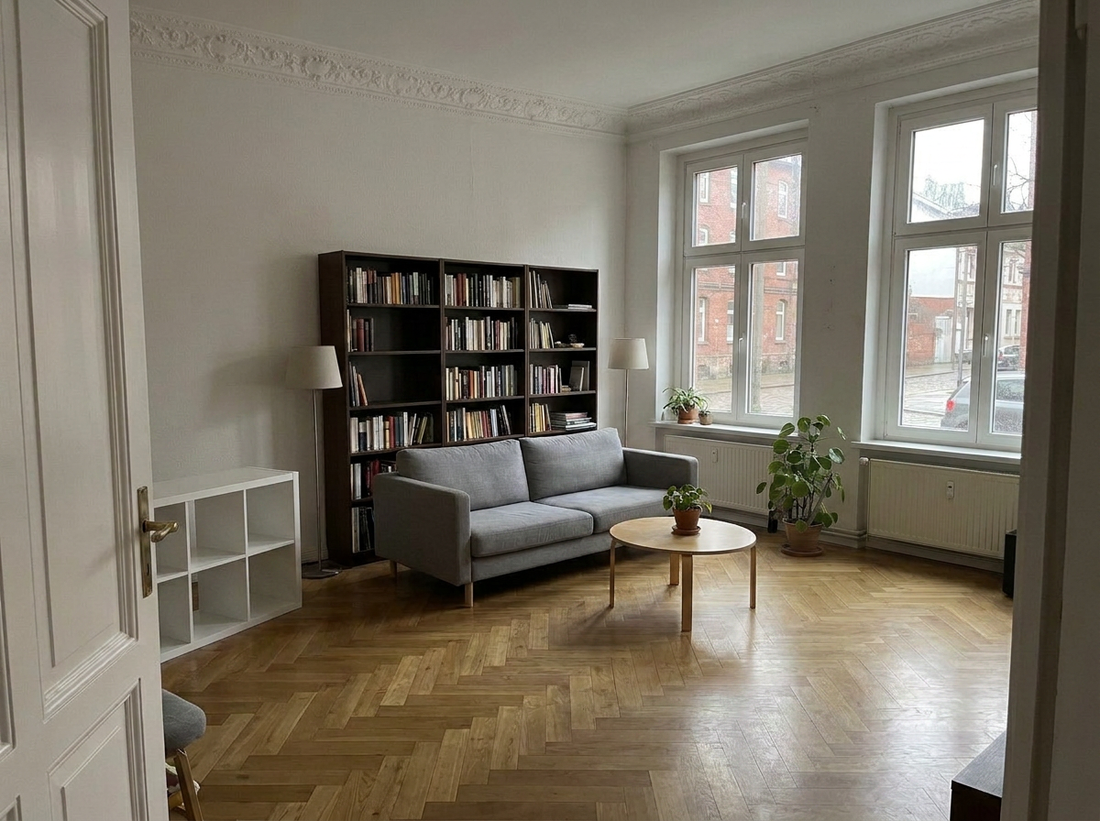 After
After
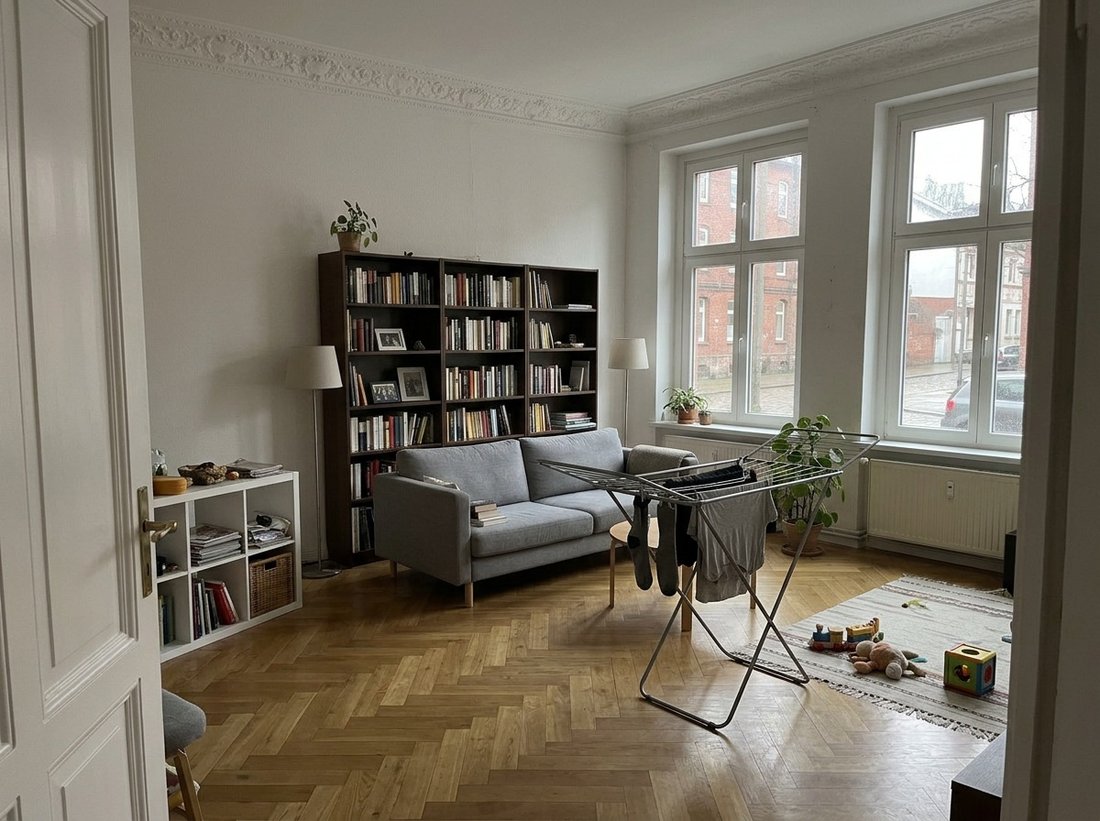 Before
Keep the phone level and show how the room works
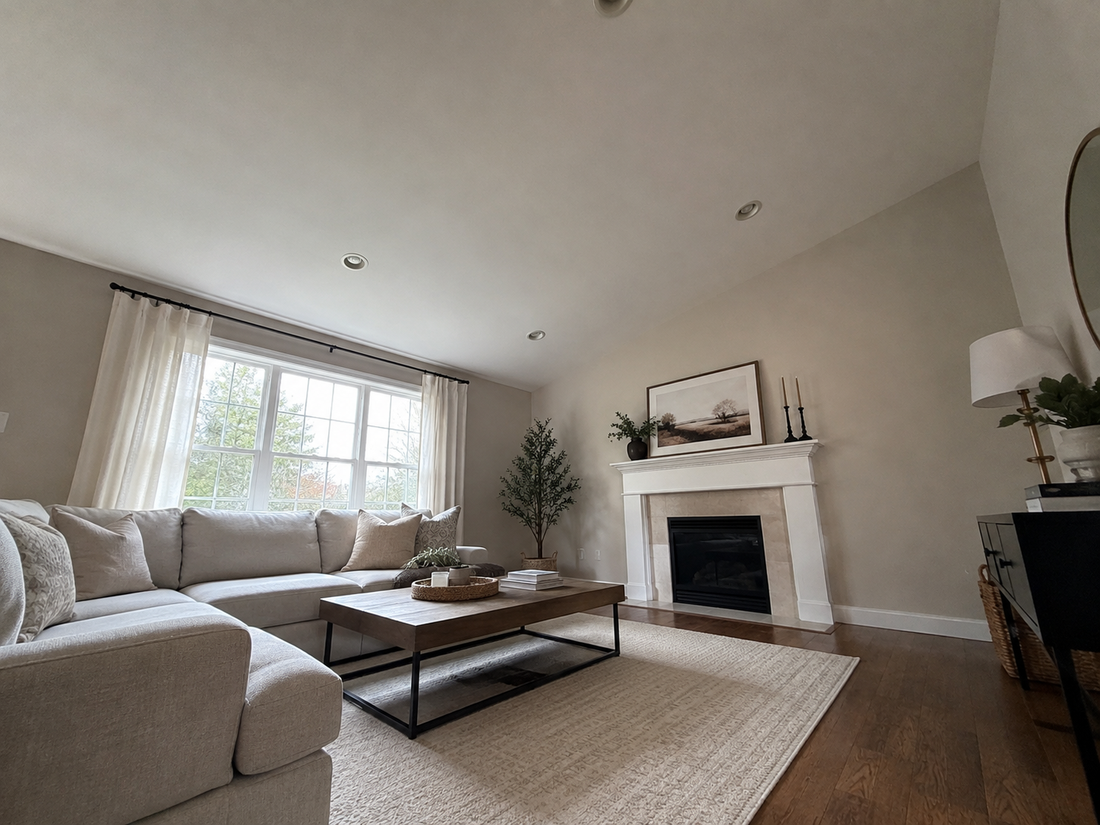
The easiest way to make an iPhone listing photo look more professional is to keep the phone upright.
When the phone is tilted upward, walls appear to lean inward. When it is tilted downward, furniture and floor areas can become distorted.
Hold the phone approximately around chest height. Use the onscreen grid and level to compare the image with door frames, wall corners, windows, kitchen cabinets, wardrobes, and vertical tiles.
Do not panic when the lines are not completely perfect. Small perspective problems are among the easiest issues to correct during editing.
Apple Photos provides straightening and perspective controls, while tools such as Lightroom offer more advanced automatic and guided corrections. (Apple, “Edit photos and videos on iPhone”; Adobe, “Correct perspective with Guided Upright”)
What editing cannot fully correct is an angle that hides the important parts of the room. Before pressing the shutter, check whether viewers can see the windows, understand the connection to the next space, recognize the room’s main feature, and see where major furniture fits.
Most rooms only need one strong establishing photograph and one supporting angle.
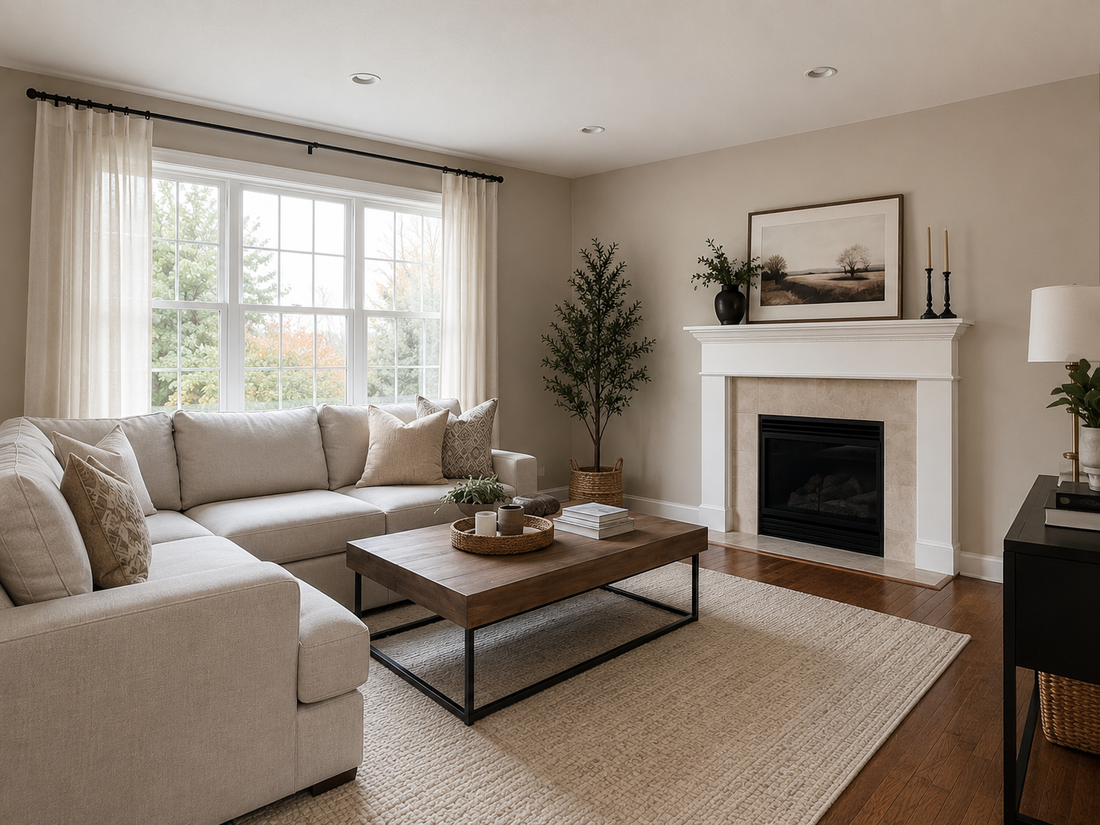 After
After
 Before
Photograph every important space before worrying about editing
One of the few problems an editing app cannot solve is a missing photograph.
Walk through the property before leaving and confirm that you have captured the front exterior, main living area, kitchen, dining area where applicable, every bedroom, every bathroom, balconies or terraces, the garden, and relevant parking, storage, garage, utility, or view features.
You do not need dozens of photographs of every room. The objective is not to reach a specific number. It is to prevent buyers from wondering what has been left out.
For every room:
- Identify the main feature.
- Find the clearest angle using the 1x camera.
- Check whether the phone is approximately level.
- Tap a medium-bright area of the room.
- Reduce the exposure slightly when the windows are completely white.
- Capture the photograph.
- Move slightly and capture one alternative.
- Review the image for reflections and obstructions.
Apple allows users to tap and hold an area until AE/AF Lock appears, helping maintain consistent focus and exposure while taking several versions. (Apple, “Use iPhone camera tools to set up your shot”)
You do not have to choose the final photograph while standing in the room. Capture two or three sensible options and select the strongest version later.
| Priority | Photograph |
|---|---|
| Essential | Front exterior, main living area, kitchen, primary bedroom, and main bathroom. |
| Usually needed | Dining area, remaining bedrooms, remaining bathrooms, backyard, balcony, or terrace. |
| Include when relevant | View, home office, utility room, garage, storage, fireplace, or renovated detail. |
| Contextual | Rear exterior, street approach, building entrance, and shared facilities. |
| Usually omit | Repetitive angles and close-ups that do not explain the property. |
Do not worry when windows look too bright
Bright windows and darker interiors are one of the most common challenges in real estate photography.
Your eyes can see the room and the outdoor view simultaneously. A camera has more difficulty recording both brightness levels in a single image.
The iPhone’s HDR processing helps by combining information from different exposures. Apple describes HDR as a way to retain more detail in high-contrast situations. (Apple, “Adjust HDR camera settings on iPhone”)
For many listings, the automatic HDR result will be completely usable.
When a window remains too bright, tap inside the room, drag the exposure control slightly downward, capture a darker version, and take a normal version as well. Keep the phone in the same position.
The final image should not look artificially flat. Windows should normally remain brighter than the room.
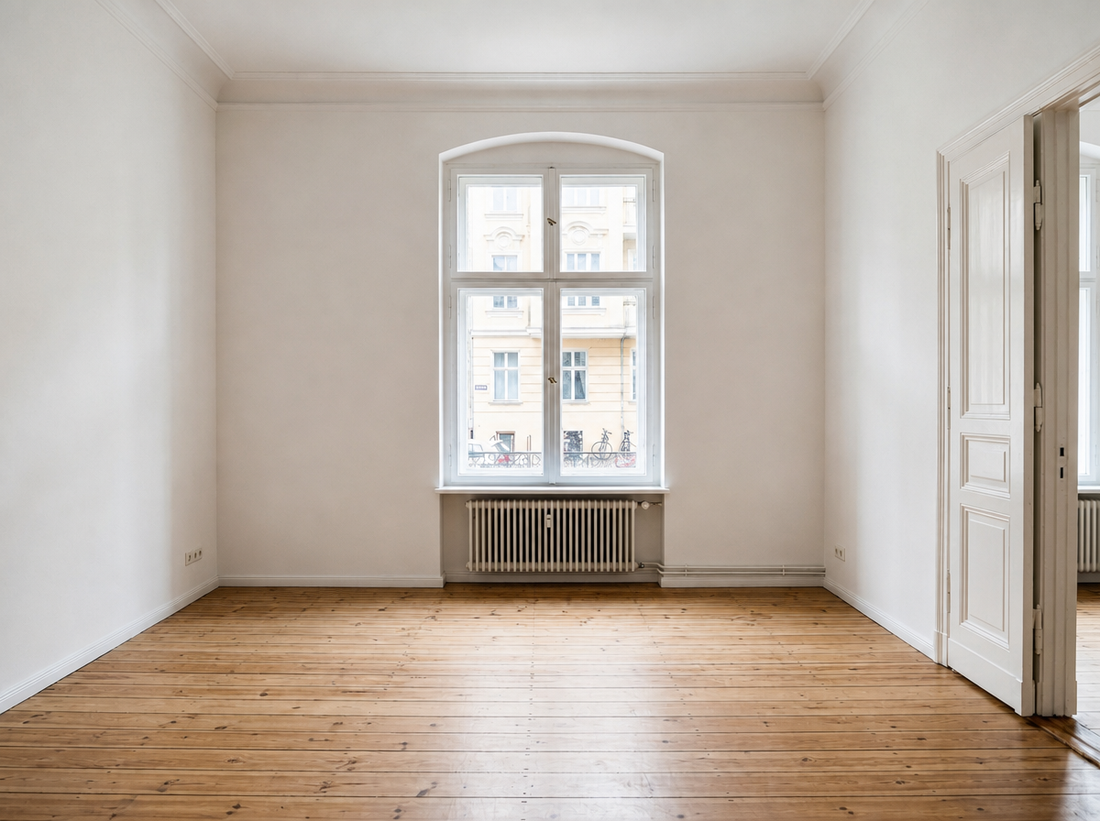
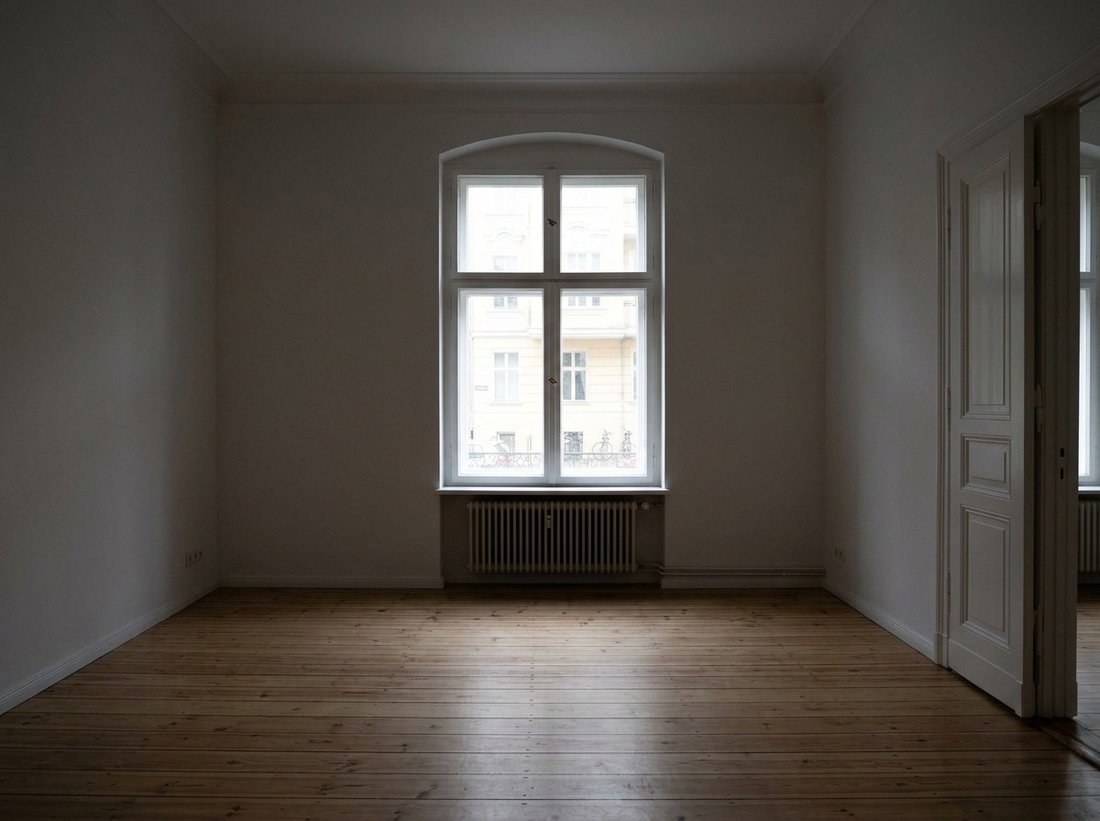
Use a darker image and let AI improve the room
Traditional bracketing in real estate photography means taking the same photograph at several brightness levels. A darker frame protects the windows, while a brighter frame protects the interior.
For a simpler AI-assisted workflow, prioritize the darker photograph when it contains the window and fixture detail you want to preserve:
- Place the phone on a tripod or hold it steadily.
- Compose and level the photograph.
- Tap inside the room to set focus.
- Drag the exposure control downward until some detail becomes visible outside the windows.
- Capture the darker photograph.
- Upload that image to VisuGenie.
- Use lighting correction or final enhancement to improve the darker interior while keeping the captured highlight information.
The source image may initially look underexposed. That is not necessarily a problem. Brightening a darker interior is often more practical than attempting to recover window information that was never captured and appears completely white.
VisuGenie does not merge a traditional multi-image bracket. The practical shortcut is to give it one stable, darker source image with useful highlight detail and let its supported lighting workflow improve the room.
Advanced photographers can still capture dark, medium, and bright frames and merge them in dedicated HDR software. Adobe explains that exposure-bracketed images can be combined into one HDR photograph, with alignment and deghosting tools helping when small changes occur between frames. (Adobe, “Merge photos to create HDRs, panoramas, and HDR panoramas”)
 After
After
 Before
Most common iPhone photo problems are editing problems
Agents sometimes review their photos and assume the shoot has failed because the images do not yet look like finished professional photographs.
That comparison is misleading. Professional listing images are normally edited too.
A good editing workflow can improve brightness, shadow detail, window highlights, white balance, color consistency, cropping, tilted horizons, vertical perspective, lens distortion, glare, harsh lighting, minor visual distractions, sharpness, and resolution.
Apple Photos already provides controls for exposure, highlights, shadows, contrast, color, crop, straightening, and perspective. It also allows edits to be copied between photographs. (Apple, “Edit photos and videos on iPhone”)
Lightroom offers more detailed control, while Photoshop is helpful for precise retouching, selections, window blending, and object removal. (Adobe, “Remove objects from images in Photoshop”)
AI real estate photo editors can simplify the workflow further by turning several manual adjustments into a more guided process.
What VisuGenie can help correct
VisuGenie supports several tasks that are useful after an iPhone property shoot, including:
- Lighting correction.
- Harsh-light and glare reduction.
- Camera perspective correction.
- Final cover-photo enhancement.
- Room decluttering or empty-room cleanup.
- Selected object removal through custom editing.
- Image upscaling.
- Exterior weather, lighting, or time-of-day changes.
- Landscaping refresh.
- Virtual staging for empty rooms.
- Interior renovation visualizations for walls, floors, and finishes.
The workflow is designed around uploading a source photograph, selecting the appropriate task, reviewing the result, retrying when necessary, and downloading the finished visual.
This means a slightly dark, poorly balanced, or visually messy iPhone photograph does not necessarily require a reshoot.
The most useful source image is one that is reasonably sharp, shows the complete room, avoids severe motion blur, does not cut off important features, and represents the real layout accurately.
From there, VisuGenie can handle much of the presentation work. Explore the available VisuGenie visual tools.
Use a simple three-level editing system
Instead of asking whether a photograph is “good” or “bad,” decide which type of editing it needs.
Level 1: Basic correction
Use this for a photograph that already shows the room clearly. Typical corrections include brightness, highlights, shadows, white balance, straightening, modest contrast, and sharpening.
Level 2: AI enhancement and cleanup
Use this when the source photograph is usable but requires more work. Typical corrections include glare reduction, stronger perspective correction, exterior-lighting improvement, cleanup of movable clutter, cover-image enhancement, upscaling, and consistency across the listing. This is where an AI real estate photo editor such as VisuGenie can save agents a great deal of manual editing.
Level 3: Visualization
Use this when you want to show a possible version of the property rather than only correct the photograph. Examples include virtual staging, renovation visualization, different furniture styles, landscaping changes, season changes, and day-to-twilight presentation.
The practical distinction is straightforward: corrective editing improves how the photographed property is presented; transformative editing shows a staged, proposed, or alternative version.
What should be fixed before shooting, and what can AI handle later?
Use the following table during the property visit. It keeps the photoshoot manageable and avoids expecting an occupied home to look like an empty showroom.
Do the easy physical preparation, but do not delay the shoot because every room is not perfect. Capture every important space clearly, preserve useful highlight detail, and let VisuGenie handle much of the lighting correction, perspective correction, cleanup, decluttering, and final enhancement afterward.
| Issue | Fix before shooting | Can VisuGenie help afterward? |
|---|---|---|
| Large bin in the middle of the room | Helpful, but not essential | Yes—AI can remove it. |
| Untidy bedding | Helpful, but not essential | Yes—AI can tidy its appearance. |
| Personal photographs and belongings | Only when convenient | Yes—selected personal items can be removed. |
| Clothes, toys, or pet accessories | Remove large obstructions | Yes—movable clutter can be cleaned up. |
| Toiletries and objects on worktops | Only when convenient | Yes—AI decluttering can simplify the surface. |
| Slightly dark room | No | Yes—lighting can be corrected. |
| Yellow or uneven lighting | Not necessarily | Yes—lighting and final enhancement can help. |
| Tilted walls | Try to keep the phone level | Yes—perspective can be corrected. |
| Bright window glare | Capture a darker exposure | Yes—the darker image can be enhanced. |
| Empty room | No | Yes—virtual staging can show its potential. |
| Dull exterior weather | No | Yes—weather and exterior lighting can be improved. |
| Weak landscaping presentation | No | Yes—a landscaping refresh can improve its presentation. |
| Severe motion blur | Take the photo again | Usually not reliably. |
| Missing room | Photograph it | No. |
| Major feature hidden by furniture | Change the camera angle | Not reliably. |
| Permanent damage or a relevant defect | Photograph it accurately | It should not be concealed. |
Review the gallery as a complete listing
Once the photographs have been edited, review them together rather than judging each image separately.
Check that walls and cabinets appear reasonably straight, exterior horizons are level, images have consistent brightness and color, no important room is missing, ultra-wide distortion is not distracting, mirrors do not show the agent or tripod, every image provides new information, and the first image is one of the property’s strongest truthful views.
Also check that staged or materially transformed images are identified where required.
A typical sequence might be:
- Strong exterior or hero interior.
- Main living space.
- Kitchen.
- Dining area.
- Primary bedroom.
- Remaining bedrooms.
- Bathrooms.
- Secondary rooms.
- Garden, terrace, balcony, or view.
- Building entrance, street, or shared amenities.
Community discussions among agents frequently emphasize the importance of the opening photographs and gallery order. Exact performance claims in these conversations are anecdotal, but the practical point is useful: the first few images should communicate the strongest features quickly. (Reddit, “Real estate pictures”)
When should you still hire a professional photographer?
The message of this guide is not that an iPhone replaces a photographer in every situation. It is that agents have more workable options than they may realize.
An iPhone and a good editing workflow can be suitable for standard residential listings, rental properties, smaller apartments, land and development progress, properties with straightforward lighting, social-media content, and situations where speed and flexibility matter.
A professional is particularly valuable for luxury and architecturally significant properties, large interconnected interiors, difficult views and reflective surfaces, premium twilight photography, complex flash photography, drone photography, and large campaigns involving photography, video, floor plans, and print.
Practitioners disagree about where the line should be drawn. Some agents and photographers report producing acceptable work using phones, while others strongly prefer professional photography for higher-value listings. (Reddit, “As a real estate agent, do you normally take your own pictures?”; Reddit, “Help me understand! Why use phone pics for $1M+ listings?”)
Both views can be reasonable. The right decision depends on the property, client expectations, local competition, marketing budget, and the agent’s ability to produce a consistent result.
Use a professional when the listing demands specialized capture. Use your iPhone confidently when you can clearly photograph the property and use editing tools to bring the images to a professional presentation standard.
The easiest iPhone real estate photography workflow
For your next listing, follow this process.
Before the shoot
- Clean the phone lenses.
- Turn on the grid and level.
- Prepare the most visible parts of each room.
- Open curtains and blinds.
- Create a room checklist.
During the shoot
- Use landscape orientation.
- Start with the 1x camera.
- Hold the phone around chest height.
- Keep it approximately level.
- Capture one main angle and one alternative.
- Take a darker version when windows are completely white.
- Confirm that every important room has been photographed.
After the shoot
- Select the clearest angles.
- Correct brightness and color.
- Straighten vertical lines.
- Reduce glare and harsh lighting.
- Clean up distracting clutter where appropriate.
- Enhance or upscale the final images.
- Use clearly identified virtual staging or visualization when it helps buyers understand the property.
- Review the complete gallery for consistency.
The most important lesson is that an imperfect first photograph is not the end result.
Your iPhone captures the source material. Editing creates the finished listing presentation.
With a clear shooting routine and modern tools for perspective correction, lighting improvement, cleanup, enhancement, virtual staging, and exterior presentation, agents can solve many of the problems that previously required manual Photoshop work or a separate editing service.
Sources
- How to Maximize Online Visibility for Every Listing National Association of REALTORS® Published March 25, 2026 Accessed Aug. 6, 2026
- Use iPhone camera tools to set up your shot Apple Support Accessed Aug. 6, 2026
- Adjust HDR camera settings on iPhone Apple Support Accessed Aug. 6, 2026
- If the camera or flash on your iPhone isn’t working Apple Support Published Feb. 3, 2025 Accessed Aug. 6, 2026
- Take Night mode photos with your iPhone camera Apple Support Accessed Aug. 6, 2026
- Edit photos and videos on iPhone Apple Support Accessed Aug. 6, 2026
- Fix geometric perspective Adobe Help Center Published June 5, 2026 Accessed Aug. 6, 2026
- Correct perspective with Guided Upright in Lightroom Adobe Help Center Published June 5, 2026 Accessed Aug. 6, 2026
- Merge photos to create HDRs, panoramas, and HDR panoramas Adobe Help Center Published May 24, 2023 Accessed Aug. 6, 2026
- Remove objects from images in Photoshop Adobe Help Center Published Aug. 4, 2026 Accessed Aug. 6, 2026
- 2026 Code of Ethics & Standards of Practice National Association of REALTORS® Published Jan. 1, 2026 Accessed Aug. 6, 2026
- Rethinking Virtual Staging for Today’s Real Estate Agents National Association of REALTORS® Published June 12, 2025 Accessed Aug. 6, 2026
- Real estate pictures Reddit Accessed Aug. 6, 2026
- As a real estate agent, do you normally take your own pictures? Reddit Accessed Aug. 6, 2026
- Help me understand! Why use phone pics for $1M+ listings? Reddit Accessed Aug. 6, 2026